
From simple shapes to extravagant patterns, one of the most fun parts about clipping your horse for the winter is getting to clip some fun designs. While I’ve never gone extreme and turned my horse into a unicorn with wings (because buffalos don’t have wings), I have clipped a few hearts on some pony bums and its easier to clip your own basic “popped-out” design than you think!

Pick your shape and location
The first thing you want to do is to choose what you want to clip onto your horse and where you want it to be—both of these depend on what type of clip you are doing. A body or hunter clip allows for a design to be placed almost anywhere, a trace or Irish clip limits the location to the neck or shoulder, and a bib clip leaves you little room for anything (unless you choose to clip the design into the hair).
Draw or print out a stencil
If you’re feeling bold, by all means go ahead and free-hand it. But being the perfectionist that I am, I choose to print and cut out a stencil of the design I will be clipping. If you’re unsure of how big or small you want your design to be, create a few stencils of different sizes.
Clip the body
No matter what type of body clip you’re doing, get rid of the hair where you know the design won’t be and leave a large section unclipped where the design will be placed. Make sure the patch is big enough by holding your stencil up to if.
Example: If I am doing a hunter clip, I will clip off all of the body hair for that style of clip except for a large patch where I want the design to be.
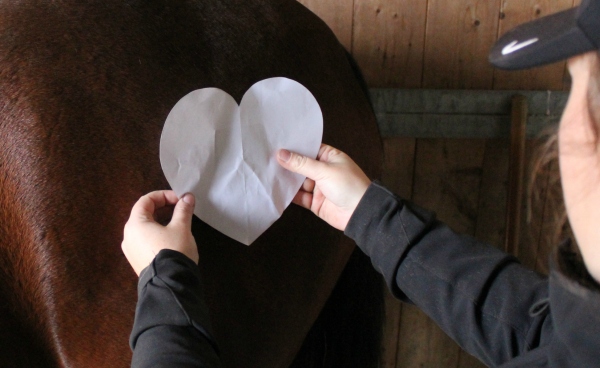
Stick on your stencil
If you made a stencil, now is the time to stick it on. Duct tape works best, but masking tape or even Scotch tape will stay on just fine (if it falls off, just stick it back on). Make sure that it is exactly where you want it to be and at the correct angle.
Clip the general shape of your design
Follow your stencil and clip around the design, but leave an extra 1/2″ to 1″ of hair around the edge. This will be clipped off later, but it gives you a little wiggle room should your hand slip or you lines come out wobbly. If you are feeling pretty confident, skip this step.
Clip away!
Go ahead and carefully clip away the remaining hair you left outside of the stencil. Be aware of the direction the hair is going and the length of the hair—both of these will affect how you should clip the design.
Example: You’re clipping a heart on the horse’s left hip area. While facing the hind end, the hair flows from left to right. The hair on the left side of the heart will need to be clipped slightly more to the left than the stencil actually shows to ensure that the hair lines up with where the heart is. If you clip directly along the stencil line, the heart will start slightly to the right at whatever the length of the hair was. The same goes for the right side of the heart—the hair will need to clipped slightly more to the left than the stencil allows to accommodate for the hair direction and length.
Add the details
Clean up the edges and you are good to go!

If you hate it, it’s just hair and it’ll grow back or you can clip it off and try again next time. If you love it, take a bunch of photos as proof that you are a master artist with magical clipper-wielding hands.
Happy clipping!

That is so cute!
LikeLike
I have seen clipping designs but have never thought about using a stencil! I tried to free hand mine.. it came out so bad I just ended up clipping the pop-out off!
LikeLike